Showing posts with label anti-candida. Show all posts

Wednesday, December 21, 2011

Merry Christmas

It's been a while between posts here. I haven't been baking much the past few months. With studies, a new job, plus ensuing health issues, I've been keeping my diet simple, & quite natural & unprocessed. Lots of vegetables & a little bit of meat. All dairy has once again been struck from my diet, since the reactions I was getting from cheese was becoming almost violent. With the cold setting in, this has consisted of a diet of lots of steamed vegetables.

But, since Christmas is approaching, I figure this is the time of year to create something indulgent. My stomach hasn't agreed the last few days; it's chosen this time of year to react heavily. But what's one day, right?

This year I've made myself gingerbread, cinnamon rolls & chocolate truffles. The truffles were just a mix of coconut flour, cocoa, psyllium husk, erythirol, stevia, shredded coconut, ground almonds & hazelnuts, coconut oil, tahini & soy milk. Plus whatever spices tickled my fancy. I'd post a recipe for those, but there was really no measuring done. It was just a taste-as-you-go fest!


I made two batches of cinnamon rolls; one with grated zucchini & one without. The batter comes up quite moist with zucchini added. You can omit this if you choose. It will, however, yield a much smaller batch. Naturally these don't rise since there's no yeast, so they do come out quite small. I've used shredded coconut in place of pearl sugar. If you do not want this, simply omit.

I've also begun using erythritol, a sweetner derived from sugar alcohol which has no calories, can add bulk to baked goods, & goes well with stevia. It's a natural sweetner & doesn't raise blood sugar, & I've found no gastrointestinal distress while using it, though I do keep usage to a minimum & only use it as a partner to stevia. For more information, please read more here. If you don't feel comfortable using this product, simply omit. You could substitute with palm or coconut sugar, but as I've not used either of these sugar, I cannot say how they would affect the taste.

The batches below are really intended for one person. For a higher yield, double the amounts listed.

Please find below my recipes for Paleo-friendly, gluten-free, sugar-free, grain-free, dairy-free Gingerbread soft cookies & Cinnamon Rolls!

Soft Gingerbread Cookies
(paleo, gluten-free, sugar-free, dairy-free, grain-free)


Ingredients:
1dl & 1 tablespoon / 30g / 1/4 cup coconut flour
1 tablespoon psyllium husk
3 egg whites
1 egg yolk
1 tablespoon ghee, melted
2 tablespoons almond flour
2 mls powdered stevia (add more if you want it sweeter
2 tablespoons erythritol
1dl/100mls soy milk
½dl/50mls water
1 tablespoon apple-cider vinegar
1 ml bicarb soda
2 teaspoons cinnamon
2 teaspoons ground ginger
1 teaspoon ground cardamom
1 teaspoon ground cloves
1ml vanilla
pinch of salt

Method:
1. Preheat oven to 180 degrees celcius.
2. Add egg whites to a bowl & beat with an electric mixer till white peaks form.
3. Add egg yolk to whites & beat with mixer, blending in.
4. Add milk, vinegar & water, mixing to a good consistency.
5. Sift all dry ingredients together & add to the bowl. Add the melted ghee & mix together with a wooden spoon.
6. Once mixed together, all the mixture to sit for a few minutes. This allows the ingredients to hold together better.
7. Roll out onto baking paper & cut into shapes with cookie cutters or roll into small round cookie shapes.
8. Bake for 25-30 minutes.


Cinnamon Rolls
(paleo, gluten-free, sugar-free, dairy-free, grain-free)


Ingredients:
1dl & 1 tablespoon / 30g / 1/4 cup coconut flour
1 tablespoon psyllium husk
3 egg whites
1 egg yolk
½dl - 1dl / 50-100mls grated zucchini
2 mls powdered stevia (add more if you want it sweeter
2 tablespoons erythritol
1 tablespoon apple-cider vinegar
50mls soy milk
50 mls water
1 ml bicarb soda
1 teaspoon ground cardamom
pinch of salt
shredded coconut
extra egg yolk, for glazing

Butter mixture
2 tablespoons melted ghee
1-2 teaspoons ground cinnamon
up to 1 tablespoon erythirol
1-2mls stevia

Method:
1. Preheat oven to 180 degrees celcius.
2. Add egg whites to a bowl & beat with an electric mixer till white peaks form.
3. Add egg yolk to whites & beat with mixer, blending in.
4. Add milk, vinegar & water, mixing to a good consistency.
5. Sift all dry ingredients together & add to the bowl. Add the melted ghee & mix together with a wooden spoon.
6. Once mixed together, all the mixture to sit for a few minutes. This allows the ingredients to hold together better.
8. Roll out onto baking paper & shape batter into a rectangle. Prebake in oven for 5 minutes.
9. Remove from oven. Spread butter mixture over batter, adding more cinnamon & sweetners once it's spread over. Roll up into a log & cut into slices. Glaze with egg yolk.
8. Bake for 25-30 minutes, removing halfway to turn & glaze with more egg yolk & sprinkle with shredded coconut.
Yields about 8-10 small rolls.


*Note: I will start listing 'dl' measurements, as I live in Sweden, & measuring cups come in millilitre or decilitre measurements, not by cup. I will also list the millilitre as a guide to how much is required, & will list weights when this is taken.

This has been submitted to Amy's Slightly Indulgent Tuesday

Friday, June 17, 2011

Paleo Bacalhau

Being half-Portuguese, Bacalhau is a dish I grew up with. Served at every family gathering, whether it was Christmas, Easter, a birthday, a wedding, whatever season, it was there. It's been a staple for my father's family, & something that is very Portuguese in my eyes.

Since having to cut potatoes out of my diet, it's one dish I haven't had in a long time. There have been moments at family gathering where I would poke around the potato, scooping out what fish, eggs & olives I could find. Alas, I would end up with a rather small serving, or sometimes none at all, as the digging around could get quite tedious.

This past Easter was my first without my family & my first in Sweden. I felt myself missing this dish, & since H had never had Portuguese food before, I ventured to make one that would be 'Nat-friendly', while making a traditional version for H himself.

First, I decided to substitute the potatoes with zucchini. Bacalhau is a dish that has countless variations, but the one that is familiar to me is sliced potato, with sauteed onion, boiled eggs & black lives. So, with this in mind, I decided sliced zucchini would be a worthy replacement, keeping to the layout of the dish.

This serving below is for one. I used unsalted cod in this dish, though traditionally salted cod would be used. This would be soaked initially, then drained, then cooked. I simply added salt to replace the missing saltiness of this dish. I'm also not fond of overly salty foods, so this was fine for me. Those who want more of the real thing would do well to search out salted cod.


Paleo Bacalhau
Serves 1

1 medium zucchini, sliced
200g cod
2 yellow onions, sliced
1-2 cloves garlic, sliced
olive oil
1 egg, boiled
4-5 black or green olives
salt & pepper, to taste
paprika (optional)

1. Preheat oven to 180 deg.
2. Place cod in a saucepan filled with water. Add salt (up to 1 tablespoon or more, depending on how salty you want your fish) & simmer gently until cooked. Strain & set aside.
3. Sautee onion & garlic in a frypan with 1-2 tablespoons of olive oil (extra virgin is best), until transparent. Remove from heat.
4. In a baking dish, place first layer of zucchini, to cover the bottom layer. You can add another layer, if you like. Ad a light drizzle of olive oil & sprinkle with salt
5. Add a layer of cod, followed by a layer onion. Drizzle this layer with olive oil & salt.
6. Repeat the previous two steps, then finish with a layer of zuchinni. Drizzle with more oil & a sprinkle of salt. Also sprinkle some paprika & pepper, if desired.
7. Slice the boiled egg into halves or quarters. Place over the top of the dish.
8. Place olives on dish. Sprinkle the top with more olive oil, salt & pepper if desired.
9. Place in oven & bake for 20-25 minutes.

Completed Bacalhau pre-baking

It was a pleasure to recreate this dish for myself & to introduce H to food from my life. I may not see my family much right now, but it's nice to revisit them with the food that I associate with them, in ways that I can enjoy as well. I hope you do too.

Thursday, March 10, 2011

Daily Indulgence

While I love baking & attempting to make something sugar-free & Candida friendly, there's only so far that I can personally go & sometimes I need some time-out from my sweet tooth, even if sugar isn't actually included in my cooking. One reason is that I tend to eat everything I make; I'm the one with the sweet tooth in the household. If it's sitting in the fridge staring at me, you can bet I'll have a taste. With my health ultimately in mind, I've decided to keep my baking escapades to the weekend or more sporadically than that for a while. While coconut flour agrees with my system, I'm still very wary about having too much at once.

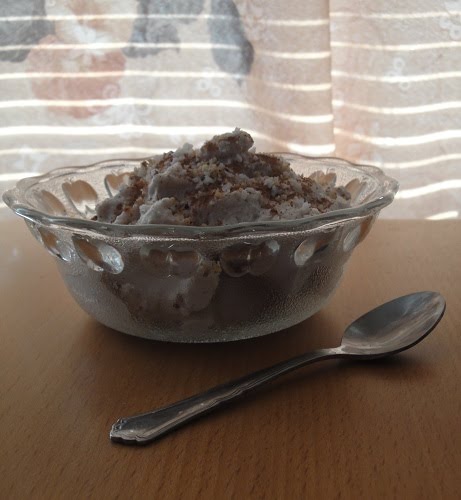
So I thought before heading off into the savoury wilderness, that I would share with you one sweet indulgence that I do allow myself as often as I desire it. Sugar-free marshmallow. Made simply with egg whites & whatever flavouring I desire, it's a low calorie protein snack that is surprisingly filling & satisfies those sweet urges.


The beauty of this is the versatility too; I've made myself blueberry flavoured, strawberry flavoured & lemon flavoured marshmallow. I simply stew some berries & take the juices from the stew & add it to the egg whites. It's also very quick to make. An instant delight!

Here I'm sharing with you my hazelnut & coconut covered chocolate marshmallow

Hazelnut Coconut covered Chocolate Marshmallow
(serves one)

Ingredients:
1-2 egg whites
20 drops liquid sweetener or 1-2mls white stevia (add more or less depending on desired sweetness)
1 teaspoon raw cacao, plus more to cover
½ teaspoon cinnamon, plus more to cover
hazelnut meal
ground shredded coconut

Method:
1. Place egg whites in a bowl, with the stevia/liquid sweetener, & beat until stiff peaks form.
2. Add cacao & cinnamon & continue to beat till the egg whites are stiff (you can add more sweetener if desired)
3. Transfer to a bowl, sprinkle with cacao, cinnamon, hazelnut & coconut.
4. Enjoy!


So quick & easy. I like to make this before H & I sit down to a movie. I never feel like I'm missing out or indulging in something I shouldn't when I have this.

Saturday, February 5, 2011

The Ultimate in Flavours


I'm going to share with you now something that I discovered the other day, then ventured to make for myself.

Chocolate cookie goodness, with something surprising in the mix

What are they? Well, obviously something with glorious chocolate involved. Chocolate is something I haven't been able to have for almost a year. After I cut sugar & carbs out of my diet, I was still indulging in cocoa mixed with milk & sweetener. I was still getting over my lack of sugary delights in my diet, & it was something that I was making to compensate. But as I learnt more about Candida, & better understood the reactions I was getting, I realised that cocoa was causing issues. After I would have my mousse creation, I would still incur cramps, gas & bloating. It wasn't long till I realised that I had to give up cocoa too, adding to the growing list of things under the simple heading of 'No'.

Forward about 10 months later, & after tiring of closing so many recipe pages down when I saw the listing of 'cocoa' or 'cacao', in the ingredients list, I decided to give raw cacao a go. Realising that the fermentation process may have been upsetting my stomach, & after being on the anti-candida diet for so long, I decided to give the mighty cocoa bean one more chance. I bought a small amount of raw cacao from a local health food store, & tried a tiny amount mixed with coconut flour, vanilla, sweetener & milk (a little pudding mix I make for myself when I want something sweet but don't feel like baking). No reactions. So I kept trying here & there, & finding that I was ok with cacao, finally. The raw kind, at least.

So when I came across the concept of bacon chocolate cookies, I felt an internal explosion of sorts. Bacon, with chocolate!? It seems this phenomenon has existed for a while, but it was something I was completely out of the loop about.

Bacon. Chocolate. Cookies! Could there be a better combination of foods & flavours?!!? Ok, depending on your deposition, the answer could be different. But for me... I love bacon. I love chocolate. I was a vegetarian for two stints lasting 10 years in total, & when I had bacon again after relinquishing my vegetarian ways (for good as well, but I have my own personal reasons for that), I couldn't believe that I had gone so long without it. Now, after having a long time without chocolate, it's nice to savour the taste of that again too.

Look at those little hints of bacon, melded amongst the
crumbly, moist goodness of the chocolate cookie.
Oh, such a sight!

I couldn't stop thinking of making these when I found them. I devised the recipe in my mind, writing down my ideas for how to make my version of them, while referencing some recipes on the net. Then I gave them a go. & oh, how I love them!

They're wonderfully moist, salty & sweet, meaty bits of bacon sitting in the soft, chocolate casing. I am in love!

Bacon Chocolate Cookies
(Sugar-free, wheat-free)

Ingredients:
65mls (½dl + 1 tablespoon) coconut flour
1 tablespoon coconut oil, melted
1 tablespoon butter, plus 1 teapsoon for cooking the bacon
1 egg
50mls milk
20mls (1 tablespoon + 1 teaspoon) raw cacao
1ml white stevia
4 strips of bacon
½ teaspoon vanilla
1/8 teaspoon bicarb soda

Method:
1. Preheat oven to 180 degrees
2. Cook bacon in a pan with 1 teaspoon of butter. Allow to cool & dice. (Save the fat left over from cooking the bacon into a bowl)
3. In the same pan, melt the coconut & butter, collecting the cooked flavours of the bacon into the butter & coconut mix. Pour into the bowl containing the residue bacon fat.
4. Mix the cacao into the melted coconut, butter & bacon fat.
5. In another bowl, sift the flour, white stevia, vanilla & bicarb soda.
6. Whisk egg in a separate bowl. Making a well with the flour, add the egg, milk, butter/coconut/bacon fat mix, bacon & mix together. The batter should be rather wet.
7. Place some baking paper on a tray & using a spoon, drop the batter onto the tray. Bake for 10-15 minutes.

Yields about 10 cookies

I also made bacon gingerbread pancakes that morning, based on a recipe from Gluten Free Girl & The Chef's Pork & Spoon site. I was having a definite bacon fest that day!

I've also added this recipe to Brittany's Seasonal Sundays session & Amy's Slightly Indulgent Tuesday

Wednesday, January 26, 2011

Strawberry Tartlets

I'm not one to step away from a challenge, & these tartlets are an example of that.

My zucchini bread was omitted from the SOS challenge because of the non-vegan ingredients & my first baking attempt with the newly purchased stevia turned out to be a bit of a disaster. So, rather than be dismayed, I decided that I would have a go at making vegan-friendly tartlets. I'd been thinking of making a pie base, as I want to make a lemon meringue pie soon. But that recipe calls for a lot of eggs & butter, not exactly vegan friendly. So, I thought I'd try my hand at making a pie crust that would be admissible for the competition, & try my hand at something that contained no animals ingredients.

I'm happy with the outcome; not too sweet, relying more on the natural sweetness of the fruit, & the pastry coming up a little bit crumbly, but oh so yummy. I used a muffin tin to create the tartlet shapes. These are a good snack-size portion, loaded with healthy fats & protein. I didn't add any stevia or sweetener of any kind to the strawberries. I find that stewing them brings out the natural sweetness in the fruit.

These would be great with some soy cream or nut creams that I've seen a few food blogs indulge in. I hope you enjoy!

I've submitted this to this month's SOS challenge & Slightly Indulgent Tuesday


Strawberry Tartlets (vegan-friendly, sugar-free, gluten-free, wheat-free)
Ingredients:
Tartlets:
100g (2dl) coconut flour
1/4 cup shredded coconut
1/4 cup coconut oil, melted
2 tablespoons ground hazelnuts
1g powdered white stevia
2 teaspoons psyllium husk
60mls water
30mls soy milk
1 teaspoon vanilla
pinch salt
pinch nutmeg

Filling:
2 cups strawberries, chopped

Method:
1. Preheat oven to 180 degrees
2. Melt the coconut oil in a saucepan. In a bowl, sift flour, shredded coconut, ground hazelnuts, psyllium husk, salt, stevia & nutmeg, & stir together with a spoon.
3. Using a beater, mix in the melted coconut oil, soy milk, water & vanilla until mixed well.
4. Grease muffin tin with some coconut oil, & pat the dough into the shapes. Bake for 20 mins.
5. While this is baking, place the chopped strawberries into a saucepan with a splash of water, & simmer on medium heat until most of the liquid has evaporated. Remove from heat & cool.
6. When the tartlet bases are ready, remove from the oven & allow to cool before adding the filling. Place in fridge to set.

Yields 8-10 tartlets

Sunday, January 23, 2011

Sexy Sauces

This week I got saucey.

Tomato saucey (or ketchup, as those Swedes are prone to call it). & bearnaise saucey. & lemon curdy. Ok, so it's not a 'sauce', but you get the point.

On Friday night I decided that I wanted to graze. No set meal, size or whatever. I wanted to pick & snack & just vary it a bit from the usual meal. Sit in front of the TV & lounge out. It is the beginning of the weekend, afterall. The best time to start to relax.

Ketchup & bearnaise lookin' all sexy in leopard

So while our smorgasbord was just a simple arrangement of some vegetables & sauteed chicken, I wanted to get creative with the dipping options. I'd made the ketchup & bearnaise before, following instructions for both. This time though, I thought I'd be a little more intuitive with them, & bang, I nailed it.

I also had excess egg yolks on hand from all the home-made marshmallow I'd been making recently (a very very simple recipe & method that I'll share in another post). I wanted to put these to some good use, so I decided to embrace sauces of both savory & sweet.

The bearnaise can be a little bit of work, but the end result is simply worth it. Smooth & creamy with a nice tang, the boy even prefers it over the pre-made options available in the supermarket. I feel like I've really nailed the slightly sweet flavour of ketchup, but much prefer this to anything that comes in a bottle.


Lemon curd was something that I had been intending to make for a while but hadn't gotten around to it. It always reminds me of my grandmother (or mormor, in Swedish). She always had some on hand in her fridge, & it got me thinking of her while I was making it. I love the hit of lemon swirled in with the sweetness of sugar (or in this case, artificial sweetener). & after I made it, I realised just how Candida friendly & beneficial it is. Lemons, butter & eggs all in one!

Ketchup
Ingredients:
1 can chopped tomatoes (400g)
1/4 large yellow onion, chopped
1 clove garlic, chopped
½ teaspoon oregano
salt & pepper, to your desired taste
10-20 drops liquid sweetener
1 tablespoon apple cider vinegar
1/4 teaspoon cinnamon

Method:
1. Add all ingredients to a saucepan on medium heat.
2. Cover & simmer till excess liquid has evaporated. Stir occasionally.
3. When cooked, put to the side & allow to cool slightly. Transfer to a blender, & process until smooth.
4. Transfer to a bowl & serve!

Bearnaise
Ingredients
125g butter, melted
2 egg yolks
1/2 large yellow onion, chopped finely
3 tablespoons apple cider vinegar
1 teaspoon lemon juice
2 tablespoons water
2 teaspoons tarragon
pinch of pepper

Method:
1. Melt butter in a saucepan. In another, using a double-boiler method, add the onion, lemon juice, 1 tablespoon of water & 2 tablespoons of vinegar. On low heat, cook till half the liquid has evaporated, then add the remaining water & vinegar. Cook for another 5 minutes.
2. Remove from heat & add the egg yolks, stirring. Add the butter slowly.
3. Place back on heat & add the tarragon. Cook for another 5 minutes.
4. Transfer to a bowl. Once cooled, serve!

Lemon Curd
Ingredients:
2 egg yolks
30g butter
60mls lemon juice
6mls liquid sweetener (60g sugar)
pinch of lemon zest

Method:
1. Cream butter & sweetener
2. Add remaining ingredients & blend together. (It will probably look like it's curdling, but this is a good thing!)
3. Transfer to a saucepan & cook for 5 minutes on medium heat.
4. Transfer to a bowl, allow to cool & serve

I plan to make a lemon meringue pie, now that I can make the lemon curd & marshmallow. I've just got to play around with some pie crust ideas I have, incorporating coconut flour, shredded coconut & hazelnut meal. Oh, I'm looking forward to that!

Thursday, January 13, 2011

Blunders in the Kitchen

'You can't bake without breaking some eggs' is what H said to console me in my failed baking attempt this evening. It was one of those nights when a balance of things occurs; where one experiment succeeds & another one fails.

Earlier I'd decided that I was going to have a break from cooking today. I live with my boyfriend who works full time, & since I'm currently unemployed, I taken on the household duties as a way to even our work load. I make him lunch each day & cook us dinner, & also tackle the other chores around the house. Very much the traditional gender roles. Not something I plan to do long term, but it's fun to play it out for a while. Today I thought I would give myself a break; there's plenty of food in the fridge that's easy to gather when the hunger hits, so not having anything to eat wasn't a problem. After I got home from drum practice though, I felt the desire hit. Not so much to eat, but to create. So I decided to have another go at zucchini bread that I could this time consume.


My first & last batch contained flax seeds, an ingredient I recently tried to reintroduce into my diet, but discovered I still can't consume it. My stomach just really can't take flax. It continues to induce a massive cramping response in my stomach, & last time I baked this bread, I was on the couch in pain for hours.

So I made a new loaf, sans flax. All was going well at this point. The batter tasted fine, I'd made notes of the ingredients as I went along. It was looking pretty after I sprinkled some pumpkin seeds on top. As I placed the loaf into the oven, I considered remaking the Scandinavian thumbprint cookies for this month's SOS challenge, hosted by Ricki & Kim (the challenge ingredient being coconut oil, which I use in all my cooking, so I'm eager to put a recipe forward for the event). Even though my zucchini loaf contains coconut oil, the original recipe isn't vegan friendly (however it can be easily made so, & I've added these alterations to the recipe below), so I decided that while that was baking I would go on to my cookies. & this is where it all fell downhill.

Zucchini loaf looking pretty & ready for the oven

I had finally purchased some stevia the other day. It's white stevia, & I've never used it before. In Australia I could only find green stevia; this white stevia is 200-300 stronger than sugar, whereas green is 40-50 times stronger. So I placed 3 grams of it into my 130 gram flour mix thinking it would be enough. No, it was too much. Way too much. The taste of the stevia overwhelmed. Not wanting to waste any of my mix, I added more flour, more oil, more coconut milk. Just making a larger batch. I threw out my idea of making thumbprint cookies & just added some strawberries to the mix to give the batter more moisture & to absorb more of the flavour. This worked. I rolled the mix out & cut it up using some cookie cutters, then placed it into the oven after taking the loaf out.

I decided to turn the tray around after about 10 minutes of baking, so everything would bake evenly. I drew out the tray, & one cookie fell through the lower gap of the door. I placed the tray on the open door & grabbed some tongs, trying to retrieve the lost cookie. In a moment of thoughtlessness, I grabbed the door to close it, hoping the cookie would fall through. Forgetting I'd placed the tray of cookies on it. All but 5 fell through the gap, & down into the dirty shelf below. Oh man.

I placed the remaining cookies back into the oven, scalding myself for such a silly move, & gathered the lost cookies. What a waste. I hate waste. Hate it. It's something my mother instilled in me as a child. If you won't eat it now, save it for later. We always had leftovers in the fridge. 'Waste not, want not'. So I was a little disappointed when I had to throw away most of my batch.

To top it off, I've been experiencing die-off effects from all the coconut oil that I used in the cookie mix. As I am want to do while baking, I sample the batter as I go along to make sure that it all tastes right. In an attempt to keep them vegan, I only used coconut oil, no butter. Instead of milk, I used coconut milk. So there was a lot of coconut fat in the batter, which basically means a lot of coconut oil. Too much coconut oil. Coconut oil is used in healing Candida, as it's antibacterial & high in saturated fat, which has been proven to kill Candida overgrowth. But too much of a good thing is a bad thing. My gut isn't happy right now. But at least a lot of bacteria is getting killed off :P

So there you have it. Where one fails, one also succeeds. My bread came out great. H was happy with it. He was even satisfied with one of my failed cookies, saying that the stevia taste wasn't overpowering & it reminded him of licorice root, & that it tastes better than the liquid sweetener I've been using. So that's something. My first attempt with white stevia may not have come out as planned, but it's definitely been a lesson learned. Here's to a more successful attempt later.

But, enough wallowing. Here's my success of the evening: my version of zucchini bread. The taste came out great, it really reminded me of bread. The taste is simple, & therefore open to have any kind of topping added to it. It's moist & thick, & high in protein with good fats (yes, saturated fat is a good fat, despite what we may have been told over the years. A lot of research being conducted is finding its health benefits are much greater than the vegetable oils we've taken to consume, & is debunking former opinions of the detriments of saturated fat). I wanted to create something different from other people's versions of zucchini bread. I can't have dried fruit, & most nuts are out for me, & sometimes it's nice to have a simple bread. I've added some vegan alterations to the recipe, so everyone can give it a go. & I've decided that this will be my submission to this month's SOS challenge!

I hope you enjoy it as much as we are!


Zucchini Bread
Ingredients:
1dl + 1 tablespoon (115g) coconut flour, sifted
1 tablespoon (15g) psyllium husk
1 tablespoon (15g) ground hazelnuts
1/4 large zucchini, grated
1 teaspoon cinnamon
2 mls liquid sweetener/ 20g sugar / ½ml white stevia
25g butter, melted
15g coconut oil, melted
2 eggs
1 tablespoon apple cider vinegar
45 mls water
1/4 cup milk
1/4 teaspoon bicarb soda
pinch of salt
pinch of nutmeg
pumpkin seeds

(For a vegan alternative, remove the eggs & double the amount of psyllium husk & liquids; replace milk with soy or coconut milk; replace butter with coconut oil)

Method:
1. Preheat oven to 180 degrees celcius.
2. Sift coconut flour. Add psyllium husk, ground hazelnuts, cinnamon, bicarb, salt & nutmeg to the same bowl & mix well together.
3. Whisk eggs in a seperate bowl. Add the liquid sweetener (if using stevia, add to the dry mix), vinegar, milk & water & stir together.
4. Add the melted butter & coconut oil to the flour mixture & stir through. Add the rest of the wet ingredients & the grated zucchini, & mix well together. The batter should be sticky but it should hold together well.
5. Line bread tin with baking paper & place the batter in the tin. Top batter with the pumpkin seeds.
6. Bake at 180 degrees for 40-45 minutes.

Thursday, December 30, 2010

God Jul!

Ok, so I'm little behind in regards to this post. I meant to share this before Christmas. But as is usually the case at this time of year, things were quite hectic & busy. Plus combined with the fact that it was my first White Christmas, & first Christmas in Sweden, my thoughts weren't exactly on updating my blog.

So the day may have passed, but I still want to share with you what I had for Christmas. Being the only one in my (new) family who is heavily intolerant to a lot of foods, I decided to make myself some sweet Christmas treats, so I wouldn't feel like I was missing out on anything. Here's my spread:


I do wish I had taken more photos, I apologise for that not being the best shot. But you get the idea. I made myself choc-hazelnut truffles, Scandinavian thumbprint cookies, gingerbread cookies, & blueberry raspberry blondies. The gingerbread was my own recipe concoction I've been playing around with for a while (since so many of the spices in gingerbread are so very good in helping to combat Candida). The truffles I made where another bit of guesswork, based on Elana's various truffle recipes; the Scandinavian thumbprint cookies were my alteration of Kelly's recipe, & the blondies were another alteration of a recipe, this time courtesy of Amy


I'll post my altered recipes for each soon, as well as my yummy gingerbread. H was very impressed with my spread (even helping me eat my blondies & thumbprint cookies!). His mum tried my gingerbread & said that it tasted just like pepparkakor, just without the crunchiness the original ones contain (mine are rather soft, as there is no syrup in them to harden them).

Sugar-Free/Gluten-Free/Flour-Free Gingerbread Cookies
Ingredients:
½dl (50g) coconut flour
½dl (50g) soy flour (can alternate with other bean flours if soy is not tolerated)
1 tablespoon (15g) psyllium husk
½dl (50 mls) water
½dl (50 mls) milk (for dairy free, use soy/oat/rice/almond/coconut milk)
1 egg
2 teaspoons liquid sweetener (equals 100g sugar)
1 tablespoon coconut oil, melted
1 tablespoon butter, melted
1/4 teaspoon bicarb soda
2 teaspoons cinnamon
1½ teaspoons dried ground ginger
1 teaspoon cardemom
1 teaspoon ground cloves
2 mls vanilla essence
pinch of nutmeg
pinch of salt

Method:
- Sift the flours into a bowl. Add the rest of the dry ingredients & mix well.
- Melt coconut oil & butter. Whisk egg in another bowl, & add the rest of the wet ingredients. Stir together.
- Add the wet ingredients to the dry ingredients & stir together. Cover the bowl with plastic wrap or place the dough into an airtight container & leave it in the fridge overnight.
- Preheat oven to 180 degrees celcius.
- Roll dough flat with a rolling pin, then cut into cookies using cutters. Place the cookies on a tray covered with baking paper & bake for 15 minutes.

Enjoy! Writing about this now makes me want to go & bake another batch...

Saturday, December 18, 2010

Strawberry Mookies

I'm making my first recipe submission! A little exciting & nerve-wracking. I don't know if what I make is really for other people's tastes besides my own, but I'm never gonna know if I don't throw myself out there & take a chance, now am I? I'm going to submit it to Amy's great site Simply Sugar & Gluten Free. I've been following her site for a few months now, & have tried a variety of her recipes, so I'm a little nervous & excited about doing this.

I made these after some experimenting with coconut flour. As I've stated before, coconut flour has opened many doors for me food-wise. Most flours I cannot tolerate, as with most nuts. & I'm not too keen on nut flour only mix in my baked goods. I can't enjoy an indulgence in them, as the fat content lays heavy on my mind (even if they are good fats. I still like to keep this to a healthy limit. & I like to have the 'freedom' to indulge when those whims hit without the mental guilt barrage I put myself through - silly, I know).


I call these 'mookies', as they're about cookie size but oh-so soft & fluffy like muffins, therefore mookies. The light & fluffy consistency is thanks to the coconut flour. & because of this ingredient, these are also high in fibre & oh-so nutritious. Sweet, healthy, tasty food is fun :)


Again, this is a small serving recipe, as I tend to bake for myself. H doesn't have a sweet tooth like I do, & I figure having a small amount to indulge in is better than too much. Feel free to double the ingredient amounts as needed. As for sweetners, I use liquid sweetener. Stevia in Sweden is hard to come by, where I am located, anyway. I'm still on the lookout, & will use it once I find it (I was using it in Australia). But until then, I use a liquid sweetener that I buy at the supermarket here.

Strawberry 'Mookies'
65g coconut flour
15g psyllium husk
1 egg
15 mls water
50 mls milk
50 mls coconut milk
30g coconut oil, melted
5-6 strawberries, chopped
2t cinnamon
2mls vanilla essence
70mls liquid sweetner or 70g sugar/sweetner
pinch of nutmeg
pinch of salt

Method:
Preheat oven at 180 degrees celcius.
In one bowl, sift the coconut flour & mix together the psyllium husk. Add the rest of the dry ingredients, & stir well together.
In another bowl, whisk the egg. Add milk, water, coconut milk & oil, sweetener & vanilla essence & mix well. Add this to the dry ingredients, & stir to get a moist, sticky batter. Add more milk or water if needed. Add the chopped strawberries & stir into the mix.
Spoon into mini muffin tins, or roll into small cookies. Bake for 25-30 mins.
Cool & serve. Can be stored in an airtight container in the fridge. Yields about 10 'mookies'.

Enjoy! Feel free to tweak the recipe as needed. You could use different berries instead of strawberries, & you could replace the coconut oil with butter (& add more to your liking). These came out soft & moist for me. I ate some with a dollop of creme fraiche on top. Yums!

Friday, December 17, 2010

Soup for Breakfast (& first recipe post!)

This is what I eat for breakfast:


Not much to the to the eye aesthetically. H gives me curious & funny looks when he finds me making this in the morning. I can't have cereal or bread, & I'm not a big egg eater, so I take what I can get. I'm also not a big breakfast eater. I never have been. I tend to have breakfast about 2 hours after I wake, sometimes longer, but always after my morning pilates/yoga workout (courtesy of the lovely Ellen Barrett, I highly recommend her Pilates Yoga Blend workout). I'm also not into heavy breakfasts. I don't like food as a general that weighs heavy in my stomach, & this 'muck' I find a perfect start to the day.

It may not look like much, but it's super healthy; a mix of broccoli, cauliflower, zucchini, spinach, garlic, onion, & kale. Kale. I only started eating it recently. I ran out of it one morning & had this, sans kale. I noticed the lack of kale while eating it, & later in the day I realised I was actually craving kale. Better than the sugar cravings I get at this time of the month! (Yes, it's that time again - 'monthly fun time', as I 'lovingly' call it).


Most recipes that I'll post here will be servings for one, as I tend to make these things for myself only. H doesn't have much of a sweet tooth, & I'm not comfortable with having a cake or slice to consume all to myself, so any recipes I follow or create, I cut the ingredients in half, or even a quarter of what's listed. The same goes with this.

Broccoli, Zucchini & Cauliflower Soup with Kale
(Serves 1)

Ingredients:
4-5 broccoli florets
3-4 cauliflower florets, cut in half
small handful of spinach, fresh or frozen (I use frozen)
1/4 zucchini, sliced
handful of kale, chopped
2 cloves garlic (I'm a big fan of garlic & aren't afraid to use a lot of it, so feel free to use less)
1/2 yellow onion, chopped
1 teaspoon coconut oil
splash of milk (feel free to sub with any type of milk, sometimes I just use coconut milk)
splash of coconut milk
1tablespoon coconut oil
salt, pepper & spices to flavour

Method:
Steam or boil broccoli, cauliflower, spinach & zucchini until soft. Add to a blender with the milk, coconut milk & a bit of the water from the pot used to steam or boil the vegetables. Blend together until smooth.
In a pan, heat coconut oil & add garlic, onion & kale. Sauté until onion is translucent. Transfer to a bowl, adding the vegetable puree on top.
Add salt, pepper & spices to your liking. I add garlic (anti-fungal), paprika, tumeric (anti-inflammatory), dill, salt & pepper - I like lots of flavours!
Eat! Yum yum!

I love this rather unconventional breakfast, & I look forward to it each morning. I find the combination of the lightly sautéed vegetables with the puree a nice mix for textures. But then, I'm known for eating strange food!

I hope you enjoy it!

Friday, November 19, 2010

Coconut Flour, You Are My Hero

My new food hero is coconut flour. So much so that I renamed this blog in honour of this miraculous food (to me, anyway).

I recently ordered some off a Swedish website, as I haven't found it in any of the stores here in the city where I live (I live in the mid-north region of Sweden. If I was in Stockholm, I'm sure I wouldn't have had any issues finding it. Alas, was not the case here where I live).

I'd had coconut flour previously in Australia, but it still stirred a reaction in me. My stomach would bloat a little, & so I would only use it very sparingly. But I've had nothing but luck so far with the 1kg bag I've bought now, so I suspect that the flour I bought in Australia was sweetened, as this is not.

Oh boy, a whole new world of food adventures has now opened for me. I had pancakes for dinner the other night with the boy. I can't remember the last time I had pancakes! They fluffed up nicely, even The Boy said that he found them good. I was very pleased by this!

The following night, I decided to do a test batch of some cookies I was thinking of making. I'd been reading up a lot on coconut flour, trying to find conversions or liquid to flour ratio recommendations. Most reliable information said to just experiment. Coconut flour absorbs a lot of fluid due to its high fibre content, so I saw that a lot of eggs are commonly used in baking with coconut flour.

So I attempted a small batch using the flour, an egg, some psyllium husk, coconut oil, sweetener plus some spices (always throwing cinnamon into the mix - love that spice!), salt & a bit of milk to test consistency & baking times. A friend of The Boy's came over during my baking session, & tasted some of my trials. He wanted more! I couldn't be more than happy with that. If people who can eat wheat & sugar try my baked goods & enjoy it, that's definitely a good sign!

So much experimentation is in order with this flour. I can now try to make things that have been a memory of the past for so long now: cake, pizza, bread, crackers. Let's see how this goes

Thursday, October 28, 2010

Greetings

I have food allergies. This is nothing new for me; my whole life I've been allergic to yeast, mould, & lactose in foods. But in the last couple of years, the list of restricted foods has grown even further: sugar & high carbohydrate foods, most grains, legumes, starches, & processed foods. The list is loooong. What I can eat is rather short.

I didn't always have such a restricted diet, though I have lived on self-imposed restricted diets previously. I was vegetarian twice for various years. The second session evolved into a pescatarian regime, after requiring fish oil for mental health (oil tablets just didn't cut it. The reflux was nothing less than unpleasant). My vegetarian diet was heavy on grains, bread & pasta. A change in my life inspired a change in my diet, & I was suddenly a meat-eater once again. & heavily ate sugar-laden products. All of this has lead to where I am today.

I cut sugar out of my diet late last year (2009), when I found that anytime I indulged in sweets I was left in literal gut-wrenching pain. Sweets, chocolate, vinegar, beer - anything with a heavy sugar content had me in agony & feeling robbed of energy, with body aches, migraines, muddled focus, & simply feeling unhealthy. I cut out the junk & implemented more vegetables, meat, & nuts. But there were still negative responses occurring. I couldn't make sense of it. I went to a doctor & had tests done, but it showed nothing. 'You're fine', the doctor told me. But I knew I wasn't. I was only 30, yet I found carrying my own body weight around too much for my energy levels to bear. Something was wrong.

I finally got a name for it when out for lunch one day with a couple of friends. I was explaining my issues to one, & she suggested that I may have Candida. A friend of hers had recently been diagnosed, & she had been having the same issues I had. So I jumped on the net & read as much as I could find about this 'Candida'. Bingo, I felt like I'd hit the jackpot. So many of the symptoms associated with it I had. I felt so relieved at finally being able to understand what was happening with me. I read heavily about the diet that was required to overcome this illness, & my diet took another drastic change. A visit to a naturopath confirmed my suspicions, & further supplements were added to my daily regime.

Suddenly almost everything was cut out. Vinegar, gone. My beloved homemade sugar-free peanut butter & cashew nut butter was out. No more little bits of bread or crackers or chips. & my most loved of all foods, cheese, was sadly shut out. I felt... stripped. What the hell could I eat? I was now munching on lettuce, cucumber, celery - anything green that wasn't going to make my stomach feel like it was punching me from the inside & leaving me huddled in a ball for hours. Now I couldn't even enjoy carrots dipped in hummus. What the hell? But if it meant that I could overcome this & eventually bring those foods back into my kitchen, then so be it.

But boy, what a journey it's been. Eating out or at friends has been a trial. Always carrying a bag of vegetables could get tiresome at times. Explaining over & over & over that no, I wasn't on a low-carbohydrate diet out of some shallow desire to be part of a trend but merely to avoid pain became (& still does at times) rather repetitive & boring. Trying to get people to understand, especially my mother, who would always look worriedly at me because of the weight I was losing. This isn't a choice, Ma! This isn't to restrict or punish myself in any way, this is so that I feel better, feel healthy, feel able to do the things that I love.

It's not that I don't enjoy my diet either. I eat the healthiest I ever have. The restrictions can get tiring. Not being able to just grab something 'quick' can be a bummer at times when I just couldn't be bothered. But I also see it as a challenge. I now get creative in the kitchen & try to make new & exciting creations (for me, anyway) that I would never have previously considered.

So, after much scouring of the web for sites & blogs about anti-candida & gluten-free diets, recipes & lifestyles, I've decided to create my own. On the posts that will follow, I will share my own experiences, my own trials in the kitchen as I try to create foods (particularly baked goods) that I can no longer enjoy in their traditional form, but to rather recreate them in a new way. I will share when there are those days when anything I eat causes discomfort, when I can finally reintroduce a certain food, when I discover something new that doesn't react negatively within me. & when I just feel like sharing with people who understand, in this rocky path of trail & tribulation that is living allergy-free.

My days from now on (as they have been the past six months) will forever be sugar & gluten-free. While I cannot yet consume all the foods that are allowed on a gluten-free diet, the day will come when I can, & I will be happy to share the discoveries I make along the way. So to anyone who may happen to read these words & be travelling their own food journey in a similar way, I say welcome. Much love, hugs & support.