Wednesday, December 21, 2011

Merry Christmas

It's been a while between posts here. I haven't been baking much the past few months. With studies, a new job, plus ensuing health issues, I've been keeping my diet simple, & quite natural & unprocessed. Lots of vegetables & a little bit of meat. All dairy has once again been struck from my diet, since the reactions I was getting from cheese was becoming almost violent. With the cold setting in, this has consisted of a diet of lots of steamed vegetables.

But, since Christmas is approaching, I figure this is the time of year to create something indulgent. My stomach hasn't agreed the last few days; it's chosen this time of year to react heavily. But what's one day, right?

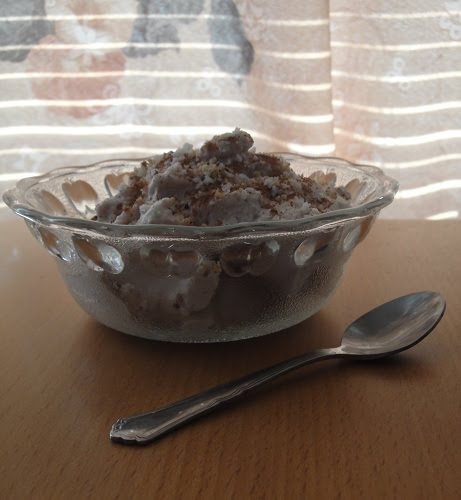
This year I've made myself gingerbread, cinnamon rolls & chocolate truffles. The truffles were just a mix of coconut flour, cocoa, psyllium husk, erythirol, stevia, shredded coconut, ground almonds & hazelnuts, coconut oil, tahini & soy milk. Plus whatever spices tickled my fancy. I'd post a recipe for those, but there was really no measuring done. It was just a taste-as-you-go fest!


I made two batches of cinnamon rolls; one with grated zucchini & one without. The batter comes up quite moist with zucchini added. You can omit this if you choose. It will, however, yield a much smaller batch. Naturally these don't rise since there's no yeast, so they do come out quite small. I've used shredded coconut in place of pearl sugar. If you do not want this, simply omit.

I've also begun using erythritol, a sweetner derived from sugar alcohol which has no calories, can add bulk to baked goods, & goes well with stevia. It's a natural sweetner & doesn't raise blood sugar, & I've found no gastrointestinal distress while using it, though I do keep usage to a minimum & only use it as a partner to stevia. For more information, please read more here. If you don't feel comfortable using this product, simply omit. You could substitute with palm or coconut sugar, but as I've not used either of these sugar, I cannot say how they would affect the taste.

The batches below are really intended for one person. For a higher yield, double the amounts listed.

Please find below my recipes for Paleo-friendly, gluten-free, sugar-free, grain-free, dairy-free Gingerbread soft cookies & Cinnamon Rolls!

Soft Gingerbread Cookies
(paleo, gluten-free, sugar-free, dairy-free, grain-free)


Ingredients:
1dl & 1 tablespoon / 30g / 1/4 cup coconut flour
1 tablespoon psyllium husk
3 egg whites
1 egg yolk
1 tablespoon ghee, melted
2 tablespoons almond flour
2 mls powdered stevia (add more if you want it sweeter
2 tablespoons erythritol
1dl/100mls soy milk
½dl/50mls water
1 tablespoon apple-cider vinegar
1 ml bicarb soda
2 teaspoons cinnamon
2 teaspoons ground ginger
1 teaspoon ground cardamom
1 teaspoon ground cloves
1ml vanilla
pinch of salt

Method:
1. Preheat oven to 180 degrees celcius.
2. Add egg whites to a bowl & beat with an electric mixer till white peaks form.
3. Add egg yolk to whites & beat with mixer, blending in.
4. Add milk, vinegar & water, mixing to a good consistency.
5. Sift all dry ingredients together & add to the bowl. Add the melted ghee & mix together with a wooden spoon.
6. Once mixed together, all the mixture to sit for a few minutes. This allows the ingredients to hold together better.
7. Roll out onto baking paper & cut into shapes with cookie cutters or roll into small round cookie shapes.
8. Bake for 25-30 minutes.


Cinnamon Rolls
(paleo, gluten-free, sugar-free, dairy-free, grain-free)


Ingredients:
1dl & 1 tablespoon / 30g / 1/4 cup coconut flour
1 tablespoon psyllium husk
3 egg whites
1 egg yolk
½dl - 1dl / 50-100mls grated zucchini
2 mls powdered stevia (add more if you want it sweeter
2 tablespoons erythritol
1 tablespoon apple-cider vinegar
50mls soy milk
50 mls water
1 ml bicarb soda
1 teaspoon ground cardamom
pinch of salt
shredded coconut
extra egg yolk, for glazing

Butter mixture
2 tablespoons melted ghee
1-2 teaspoons ground cinnamon
up to 1 tablespoon erythirol
1-2mls stevia

Method:
1. Preheat oven to 180 degrees celcius.
2. Add egg whites to a bowl & beat with an electric mixer till white peaks form.
3. Add egg yolk to whites & beat with mixer, blending in.
4. Add milk, vinegar & water, mixing to a good consistency.
5. Sift all dry ingredients together & add to the bowl. Add the melted ghee & mix together with a wooden spoon.
6. Once mixed together, all the mixture to sit for a few minutes. This allows the ingredients to hold together better.
8. Roll out onto baking paper & shape batter into a rectangle. Prebake in oven for 5 minutes.
9. Remove from oven. Spread butter mixture over batter, adding more cinnamon & sweetners once it's spread over. Roll up into a log & cut into slices. Glaze with egg yolk.
8. Bake for 25-30 minutes, removing halfway to turn & glaze with more egg yolk & sprinkle with shredded coconut.
Yields about 8-10 small rolls.


*Note: I will start listing 'dl' measurements, as I live in Sweden, & measuring cups come in millilitre or decilitre measurements, not by cup. I will also list the millilitre as a guide to how much is required, & will list weights when this is taken.

This has been submitted to Amy's Slightly Indulgent Tuesday

Sunday, June 19, 2011

Indian Love, Part One

I love Indian food. LOVE it. It's the spices; so aromatic, so flavoursome. The Portuguese girl in me grew up eating a variety of spices, & the Indians really did introduce these to the world. Vindaloo, known as an Indian dish, is actually Portuguese in origin (1, 2), having traded with Portugal since the 15th century.

So, in discovering that H had never had Indian food before, I was determined to bring him into a whole new world of culinary delights. But I knew I had to gradually ease him in. I grew up eating chilli & spicy foods, so the aforementioned vindaloo dish would not be an entry point. Not if I wanted to send him away crying, anyway. So I figured I would ease him in; something slightly spicy, but none-the-less tasty.

Palak Paneer & Chicken Rogan Josh. The recipe for the latter will follow.

During my last stint as a vegetarian, I'd discovered the wonder that is paneer. This one ingredient made vegetarian so much exciting. It has a more solid texture than tofu, & if dairy isn't an issue (paneer, for me, thankfully isn't), there's also no need to worry about the possible health implications of consuming soy (for me, personally, I really didn't enjoy tofu if it wasn't very very firm. None of that soft tofu for me. I could never stand the texture. About as pleasing to me as eating pumpkin).

I'd been reading about how easy it was to make paneer. All I needed was a cheesecloth, something I had searched for in Australia, but with no success. Here in Sweden, while wandering through a homewares store, I came across one. Yes! I knew exactly what I would do once I got home.

I cannot find unpasteurised milk here in Sweden; apparently it is against the law to sell it, unless you buy it directly from a farmer. Alas, I know no farmers, but we can buy unhomogenised milk. So I grabbed a litre of that & got to work. Here's how you too can make paneer at home (so easy!)

Paneer
(recipe references: 1 & 2)
1 liter unhomogenised milk (or raw milk, if you can get some)
2-3 tablespoons lemon juice
cheesecloth (or tea-towel)

Method:
1. Place the milk in a saucepan & bring to the boil.
2. Reduce heat to low & add 2-3 tablespoons of lemon juice. Let it sit for about 5 minutes. The milk will begin to curdle. Take saucepan off heat & let it sit for another 5 minutes.
3. Place the cheesecloth over a medium-sized bowl, & pour the curdled milk through the strainer. Gather the ends of the cheesecloth & squeeze the cheese a few times, getting rid of as liquid as possible.
4. Tie the ends of the cheesecloth together, & hand this over the sink or bowl for 30 minutes. Give the cheese another squeeze & hang for another 15-30 minutes.
5. Your paneer is ready! Feel free to use it now, or refrigerate to use soon.

Prepared paneer ready for frying

I'm not sure how long it would last in the fridge, but I would recommend using it within 3 days.

One of the dishes that introduced me to paneer was a dish called Paneer Palak. I made this for H, along with Rogan Josh. The recipe for Rogan Josh will follow this, with directions on how to make the paste from scratch.

Palak Paneer
Serves 2

Prepared paneer, cubed
1 cup frozen spinach, thawed
1-2 tablespoons butter or ghee
2 tablespoons water
1 onion, chopped
2 cloves garlic, diced
2 teaspoons ground garlic
1 teaspoon garam masala
1 teaspoon chilli
½ teaspoon ground coriander
½ teaspoon ground cumin
2 tablespoons lemon juice

Method:
1. Sautee the onion, garlic & spices in the water for a few minutes. Transfer to a mortar & pestle or a small food processor (a coffee grinder would work well, I used my blender) & grind to a paste.
2. Place the butter or ghee in a fry pan & fry paneer until golden. Add the paste & sautee for a couple of minutes.
3. Add spinach & lemon juice & cook for a few more minutes
4. Serve

Traditionally this is served on a bed of rice, but I grate raw cauliflower, then heat that in the microwave for a minute. Or you could grate the cauliflower, place it in a sieve & steam it over a saucepan of boiling water until hot. Either way, it's delicious!

Friday, June 17, 2011

Paleo Bacalhau

Being half-Portuguese, Bacalhau is a dish I grew up with. Served at every family gathering, whether it was Christmas, Easter, a birthday, a wedding, whatever season, it was there. It's been a staple for my father's family, & something that is very Portuguese in my eyes.

Since having to cut potatoes out of my diet, it's one dish I haven't had in a long time. There have been moments at family gathering where I would poke around the potato, scooping out what fish, eggs & olives I could find. Alas, I would end up with a rather small serving, or sometimes none at all, as the digging around could get quite tedious.

This past Easter was my first without my family & my first in Sweden. I felt myself missing this dish, & since H had never had Portuguese food before, I ventured to make one that would be 'Nat-friendly', while making a traditional version for H himself.

First, I decided to substitute the potatoes with zucchini. Bacalhau is a dish that has countless variations, but the one that is familiar to me is sliced potato, with sauteed onion, boiled eggs & black lives. So, with this in mind, I decided sliced zucchini would be a worthy replacement, keeping to the layout of the dish.

This serving below is for one. I used unsalted cod in this dish, though traditionally salted cod would be used. This would be soaked initially, then drained, then cooked. I simply added salt to replace the missing saltiness of this dish. I'm also not fond of overly salty foods, so this was fine for me. Those who want more of the real thing would do well to search out salted cod.


Paleo Bacalhau
Serves 1

1 medium zucchini, sliced
200g cod
2 yellow onions, sliced
1-2 cloves garlic, sliced
olive oil
1 egg, boiled
4-5 black or green olives
salt & pepper, to taste
paprika (optional)

1. Preheat oven to 180 deg.
2. Place cod in a saucepan filled with water. Add salt (up to 1 tablespoon or more, depending on how salty you want your fish) & simmer gently until cooked. Strain & set aside.
3. Sautee onion & garlic in a frypan with 1-2 tablespoons of olive oil (extra virgin is best), until transparent. Remove from heat.
4. In a baking dish, place first layer of zucchini, to cover the bottom layer. You can add another layer, if you like. Ad a light drizzle of olive oil & sprinkle with salt
5. Add a layer of cod, followed by a layer onion. Drizzle this layer with olive oil & salt.
6. Repeat the previous two steps, then finish with a layer of zuchinni. Drizzle with more oil & a sprinkle of salt. Also sprinkle some paprika & pepper, if desired.
7. Slice the boiled egg into halves or quarters. Place over the top of the dish.
8. Place olives on dish. Sprinkle the top with more olive oil, salt & pepper if desired.
9. Place in oven & bake for 20-25 minutes.

Completed Bacalhau pre-baking

It was a pleasure to recreate this dish for myself & to introduce H to food from my life. I may not see my family much right now, but it's nice to revisit them with the food that I associate with them, in ways that I can enjoy as well. I hope you do too.

Tuesday, May 3, 2011

Glad Påsk!

I'm a little late in posting this, I know. The last few weeks have been very busy, & my focus has been far from cooking. I've started Swedish school, which I attend 5 days a week. At the end of March, I went on a mini-tour to Germany with the band. We have another gig coming up in Norway, so a lot of my time has been spent drumming & studying, plus finding some activities that give me a chance to relax between those times (like Sims Medieval!). Amongst all that, I haven't really felt like cooking either.

With Easter approaching, & all the chocolate & sugar indulgences that I couldn't partake in, I started to consider what I was going to make for myself. I didn't really feel like anything sweet, beyond what I've been having regularly (like sugar-free jelly. Oh, I forgot just how easy that is to make!). H's mum came over for his birthday & bought him a cake that he & I could have - a smörgåstårta. 'What the hell..?' I hear all non-Swedes ask. A smörgåstårta is a 'sandwich cake', a savoury cake made from bread & layered with mayonnaise, cream, & various savoury toppings. While they ate it whole, I pulled it apart, wiping away the bread to consume the creamy fillings & yummy toppings. Once I'd had it, I knew what my next attempt was going to be!


First I compiled my list of ingredients, then made the bread. The cake is made a day ahead so that the flavours from the filling immerse into the bread, making the flavour fuller & more enjoyable. There are all kinds of recipes for these cakes; anything goes, really. It's all up to personal taste & preference. I based my bread recipe off one I found here, omitting the honey with stevia, & adding some milk to make up for the missing liquid.

H's mum graciously bought me a scale too, so I was able to weigh the ingredients. I can see what the big deal about them is now. 1 tablespoon of coconut flour does not equal 15 grams of coconut flour. It's furthered my ability to know how much ingredients I'm actually using, & has been easier at keeping track of nutritional values & such. I recommend anyone who cooks & bakes regularly to get one of those.

The first part of the recipe (the bread), is measured. The following part (filling & toppings) is really left up to you; I didn't really measure anything, just threw stuff together. I'll share with you what I used, but I really think it's left up to personal taste.

This serving is rather small; it's meant for 1-2 people, 2-3 servings all up. It's quite filling, very delicious & oh-so-indulgent.

Smörgåstårta
(grain-free, sugar-free)

Coconut Bread
(based off Nourished Kitchen's coconut flour bread recipe found here)
Ingredients:
80 grams butter (room temperature)
63 grams/ 130mls coconut flour
4 eggs
45mls milk (I use light milk - 1.5% fat)
10mls vinegar
1 gram stevia
1 gram baking soda

Method:
1. Preheat oven to 180 degrees celcius
2. Sift flour & add the dry ingredients together.
3. In another bowl, whisk the eggs. Add milk, butter & vinegar & mix together (I used an electric beater on low). Add the dry ingredients.
4. Place batter into a loaf tin & bake for 35-40 mins, or until it starts to brown slightly on top.
5. Leave it out to cool.

Once cooled, I sliced the loaf in half, then again sliced through the length of the loaf to make more layers. It was actually more than I needed, so I kept one of the slices for something to snack on. Feel free to have a four-layered cake - it's up to you!

Filling
Now this is where it gets experimental, but I'll begin with what I used. I had the following:

Mayonnaise
Sour cream
Cream cheese
Caviar
1/2 cup small shrimp
Dill
Paprika

Method:
1. In a bowl, add 2 tablespoons (30mls) of the mayonnaise, sour cream and cream cheese. Mix together. Add more ingredients depending on how you want this to taste (I added more mayonnaise & a little more sour cream).
2. Add the shrimp & about 1 teaspoon (5mls) caviar. Mix together, adding more caviar if desired.
3. Sprinkle dill & paprika, starting with 1/2 teaspoon (2.5mls) of each, adding more if you desire.
4. Spread the filling inbetween the layers of the bread.
5. Once it's filled, cover the cake & place it in the fridge, leaving it overnight. If you want to eat it the same day, give it at least 3 hours to sit in the fridge so the bread absorbs some of the flavours from the filling.

Cake awaiting the final process - topping!

Topping
Again, this is really up to you. I wanted a seafood smörgåstårta, so I went with some shrimp, salmon, cucumber, cheese, tomato, caviar & a hard-boiled egg, which I cut into quarters. The beauty of the smörgåstårta is you can make it with anything: chicken, ham, even omitting all the meat & seafood & making it vegetarian. Some versions have liverpaste spread through the layers. It's all up to what you feel like having.

Serve!


Thursday, March 10, 2011

Daily Indulgence

While I love baking & attempting to make something sugar-free & Candida friendly, there's only so far that I can personally go & sometimes I need some time-out from my sweet tooth, even if sugar isn't actually included in my cooking. One reason is that I tend to eat everything I make; I'm the one with the sweet tooth in the household. If it's sitting in the fridge staring at me, you can bet I'll have a taste. With my health ultimately in mind, I've decided to keep my baking escapades to the weekend or more sporadically than that for a while. While coconut flour agrees with my system, I'm still very wary about having too much at once.

So I thought before heading off into the savoury wilderness, that I would share with you one sweet indulgence that I do allow myself as often as I desire it. Sugar-free marshmallow. Made simply with egg whites & whatever flavouring I desire, it's a low calorie protein snack that is surprisingly filling & satisfies those sweet urges.


The beauty of this is the versatility too; I've made myself blueberry flavoured, strawberry flavoured & lemon flavoured marshmallow. I simply stew some berries & take the juices from the stew & add it to the egg whites. It's also very quick to make. An instant delight!

Here I'm sharing with you my hazelnut & coconut covered chocolate marshmallow

Hazelnut Coconut covered Chocolate Marshmallow
(serves one)

Ingredients:
1-2 egg whites
20 drops liquid sweetener or 1-2mls white stevia (add more or less depending on desired sweetness)
1 teaspoon raw cacao, plus more to cover
½ teaspoon cinnamon, plus more to cover
hazelnut meal
ground shredded coconut

Method:
1. Place egg whites in a bowl, with the stevia/liquid sweetener, & beat until stiff peaks form.
2. Add cacao & cinnamon & continue to beat till the egg whites are stiff (you can add more sweetener if desired)
3. Transfer to a bowl, sprinkle with cacao, cinnamon, hazelnut & coconut.
4. Enjoy!


So quick & easy. I like to make this before H & I sit down to a movie. I never feel like I'm missing out or indulging in something I shouldn't when I have this.

Monday, February 21, 2011

Swedish Delights

'Semlor' simply means 'buns' in Swedish. A treat that's enjoyed every February, H tells me that it started as something the Swedes would enjoy for one day of the year, which then extended to one week. Now, Semlor (or 'semla', in singular) are available from Christmas to Easter (according to Wikipedia).

Since arriving in Sweden, H has been telling me that I must try these, as they're a huge tradition. They're simple sweet buns, filled with marzipan & cream, topped with some more cream then capped off with the top of the bun that is cut off. Not being able to eat wheat, I decided to take the challenge of making my own allergy-friendly version for Christmas this year. The first batch was a success, which I was able to enjoy with my new family while they ate their traditional Semlor. With this month's SOS challenge being stevia, I decided to create them again, this time making vegan-friendly alterations.


While these don't look the same as the traditional ones (I use hazelnut butter in place of the almonds, as I'm intolerant to almonds), they're still delicious, filling & nutritious.

It's a little bit of work in crafting these yummy buns, but it's also part of the fun. Once baked, the middle of the bun is dug out, with the filling placed in a bowl. Mixed in with the nut paste & cream, this mixture is placed back into the bun, then topped with cream. The traditional buns have a cap placed on top, but I found this too fiddly as they are quite small, & the bun can crumble. So I skip that step, but still have a delicious end result.

Semlor
Ingredients
Buns:
½ Cup (120ml) coconut flour
100mls coconut milk
25mls coconut oil, melted
1 egg (vegan substitute: 1 tablespoon (15mls) psyllium husk with 3 tablespoons of water)
1 teaspoon (5mls) vanilla
1ml white stevia
pinch of salt
1/8 teaspoon of bicarb soda
1/4 teaspoon baking soda

Filling:
175g roasted hazelnuts (or whatever roasted nuts you prefer - almonds are traditionally used.)
stevia to taste
Coconut cream, whipped

Topping:
Coconut cream, whipped

Method:
1. Preheat the oven to 180 degrees.
2. Sift the coconut flour, vanilla, salt, bicarb & baking soda into a bowl (if using psyllium husk, add this to the bowl as well. If using an egg, whisk in a separate bowl).
3. Melt the coconut in a saucepan on low heat. Once melted, add the coconut milk & warm. Remove from heat & add to the dry mix. Add remaining wet ingredients (either the 3 tablespoons of water or the whisked egg) & stir together. (If the batter is too wet, add more flour)
4. Roll small handfuls of the batter & place into either a greased muffin tray or muffin cups. Glaze with a little coconut milk.
5. Bake for 25-30 minutes. Remove from oven & cool (yeilds about 6 semlor)


For the filling:
1. In a food processor, grind the nuts into a paste. This may take about 10 minutes. You may need to drizzle some water (I added a tiny bit of coconut milk) to get it smooth enough for a paste.
2. Add stevia to taste as it's blending (choose whatever level of sweetness you'd prefer). Once ready, transfer to a bowl.
3. Whip the coconut cream (I just gather the coconut cream from an unshaken can of coconut milk)
4. Spoon the middle of a semla into a bowl. Add nut paste & coconut cream (about equal amounts of each compared to what's been spooned out of the bun) & mix together. Spoon back into the bun.
5. Top with whipped coconut cream.
6. Enjoy! They're delicious!


H watches me curiously as I make these, & is very happy that I can enjoy some Swedish sweets. I'm going to attempt more allergy-friendly recreations. I look forward to sharing them with you!

This has been submitted to Ricki & Kim's SOS challenge & Amy's Slightly Indulgent Tuesday

Thursday, February 17, 2011

With Love

I'm not one who usually celebrates Valentine's Day. The cheesy cards, overpriced flowers, & saving one day to celebrate your love? No thanks, I prefer to give that sentiment on a daily basis.

However, this time around, I thought I'd break my own tradition & do something different. But still in a corny yet fun fashion. Since I don't have a job at the moment, but gather much pleasure from playing in the kitchen, I decided to treat H to some special home-made foods that I don't make so often.


& all in the shape of hearts. Oh, the love!

I don't eat pizza much. I love cheese, but it doesn't love me back in a very nice way. While it's not as bad as when I started on my anti-Candida diet, it still inflates my stomach, & I can feel it make its way through my intestines a few hours later. So it's very much a now & then indulgence, generally when I don't have to do anything for the rest of the night, or no band demands for the following days.


The base for these are incredibly simple. I base them from a recipe I found here, substituting coconut flour for quinoa, & adding oregano & garlic powder to the batter. To follow for dessert, I made heart-shaped raspberry chocolate cookies. Oh, the love!

Saturday, February 5, 2011

The Ultimate in Flavours


I'm going to share with you now something that I discovered the other day, then ventured to make for myself.

Chocolate cookie goodness, with something surprising in the mix

What are they? Well, obviously something with glorious chocolate involved. Chocolate is something I haven't been able to have for almost a year. After I cut sugar & carbs out of my diet, I was still indulging in cocoa mixed with milk & sweetener. I was still getting over my lack of sugary delights in my diet, & it was something that I was making to compensate. But as I learnt more about Candida, & better understood the reactions I was getting, I realised that cocoa was causing issues. After I would have my mousse creation, I would still incur cramps, gas & bloating. It wasn't long till I realised that I had to give up cocoa too, adding to the growing list of things under the simple heading of 'No'.

Forward about 10 months later, & after tiring of closing so many recipe pages down when I saw the listing of 'cocoa' or 'cacao', in the ingredients list, I decided to give raw cacao a go. Realising that the fermentation process may have been upsetting my stomach, & after being on the anti-candida diet for so long, I decided to give the mighty cocoa bean one more chance. I bought a small amount of raw cacao from a local health food store, & tried a tiny amount mixed with coconut flour, vanilla, sweetener & milk (a little pudding mix I make for myself when I want something sweet but don't feel like baking). No reactions. So I kept trying here & there, & finding that I was ok with cacao, finally. The raw kind, at least.

So when I came across the concept of bacon chocolate cookies, I felt an internal explosion of sorts. Bacon, with chocolate!? It seems this phenomenon has existed for a while, but it was something I was completely out of the loop about.

Bacon. Chocolate. Cookies! Could there be a better combination of foods & flavours?!!? Ok, depending on your deposition, the answer could be different. But for me... I love bacon. I love chocolate. I was a vegetarian for two stints lasting 10 years in total, & when I had bacon again after relinquishing my vegetarian ways (for good as well, but I have my own personal reasons for that), I couldn't believe that I had gone so long without it. Now, after having a long time without chocolate, it's nice to savour the taste of that again too.

Look at those little hints of bacon, melded amongst the
crumbly, moist goodness of the chocolate cookie.
Oh, such a sight!

I couldn't stop thinking of making these when I found them. I devised the recipe in my mind, writing down my ideas for how to make my version of them, while referencing some recipes on the net. Then I gave them a go. & oh, how I love them!

They're wonderfully moist, salty & sweet, meaty bits of bacon sitting in the soft, chocolate casing. I am in love!

Bacon Chocolate Cookies
(Sugar-free, wheat-free)

Ingredients:
65mls (½dl + 1 tablespoon) coconut flour
1 tablespoon coconut oil, melted
1 tablespoon butter, plus 1 teapsoon for cooking the bacon
1 egg
50mls milk
20mls (1 tablespoon + 1 teaspoon) raw cacao
1ml white stevia
4 strips of bacon
½ teaspoon vanilla
1/8 teaspoon bicarb soda

Method:
1. Preheat oven to 180 degrees
2. Cook bacon in a pan with 1 teaspoon of butter. Allow to cool & dice. (Save the fat left over from cooking the bacon into a bowl)
3. In the same pan, melt the coconut & butter, collecting the cooked flavours of the bacon into the butter & coconut mix. Pour into the bowl containing the residue bacon fat.
4. Mix the cacao into the melted coconut, butter & bacon fat.
5. In another bowl, sift the flour, white stevia, vanilla & bicarb soda.
6. Whisk egg in a separate bowl. Making a well with the flour, add the egg, milk, butter/coconut/bacon fat mix, bacon & mix together. The batter should be rather wet.
7. Place some baking paper on a tray & using a spoon, drop the batter onto the tray. Bake for 10-15 minutes.

Yields about 10 cookies

I also made bacon gingerbread pancakes that morning, based on a recipe from Gluten Free Girl & The Chef's Pork & Spoon site. I was having a definite bacon fest that day!

I've also added this recipe to Brittany's Seasonal Sundays session & Amy's Slightly Indulgent Tuesday

Wednesday, January 26, 2011

Strawberry Tartlets

I'm not one to step away from a challenge, & these tartlets are an example of that.

My zucchini bread was omitted from the SOS challenge because of the non-vegan ingredients & my first baking attempt with the newly purchased stevia turned out to be a bit of a disaster. So, rather than be dismayed, I decided that I would have a go at making vegan-friendly tartlets. I'd been thinking of making a pie base, as I want to make a lemon meringue pie soon. But that recipe calls for a lot of eggs & butter, not exactly vegan friendly. So, I thought I'd try my hand at making a pie crust that would be admissible for the competition, & try my hand at something that contained no animals ingredients.

I'm happy with the outcome; not too sweet, relying more on the natural sweetness of the fruit, & the pastry coming up a little bit crumbly, but oh so yummy. I used a muffin tin to create the tartlet shapes. These are a good snack-size portion, loaded with healthy fats & protein. I didn't add any stevia or sweetener of any kind to the strawberries. I find that stewing them brings out the natural sweetness in the fruit.

These would be great with some soy cream or nut creams that I've seen a few food blogs indulge in. I hope you enjoy!

I've submitted this to this month's SOS challenge & Slightly Indulgent Tuesday


Strawberry Tartlets (vegan-friendly, sugar-free, gluten-free, wheat-free)
Ingredients:
Tartlets:
100g (2dl) coconut flour
1/4 cup shredded coconut
1/4 cup coconut oil, melted
2 tablespoons ground hazelnuts
1g powdered white stevia
2 teaspoons psyllium husk
60mls water
30mls soy milk
1 teaspoon vanilla
pinch salt
pinch nutmeg

Filling:
2 cups strawberries, chopped

Method:
1. Preheat oven to 180 degrees
2. Melt the coconut oil in a saucepan. In a bowl, sift flour, shredded coconut, ground hazelnuts, psyllium husk, salt, stevia & nutmeg, & stir together with a spoon.
3. Using a beater, mix in the melted coconut oil, soy milk, water & vanilla until mixed well.
4. Grease muffin tin with some coconut oil, & pat the dough into the shapes. Bake for 20 mins.
5. While this is baking, place the chopped strawberries into a saucepan with a splash of water, & simmer on medium heat until most of the liquid has evaporated. Remove from heat & cool.
6. When the tartlet bases are ready, remove from the oven & allow to cool before adding the filling. Place in fridge to set.

Yields 8-10 tartlets

Sunday, January 23, 2011

Sexy Sauces

This week I got saucey.

Tomato saucey (or ketchup, as those Swedes are prone to call it). & bearnaise saucey. & lemon curdy. Ok, so it's not a 'sauce', but you get the point.

On Friday night I decided that I wanted to graze. No set meal, size or whatever. I wanted to pick & snack & just vary it a bit from the usual meal. Sit in front of the TV & lounge out. It is the beginning of the weekend, afterall. The best time to start to relax.

Ketchup & bearnaise lookin' all sexy in leopard

So while our smorgasbord was just a simple arrangement of some vegetables & sauteed chicken, I wanted to get creative with the dipping options. I'd made the ketchup & bearnaise before, following instructions for both. This time though, I thought I'd be a little more intuitive with them, & bang, I nailed it.

I also had excess egg yolks on hand from all the home-made marshmallow I'd been making recently (a very very simple recipe & method that I'll share in another post). I wanted to put these to some good use, so I decided to embrace sauces of both savory & sweet.

The bearnaise can be a little bit of work, but the end result is simply worth it. Smooth & creamy with a nice tang, the boy even prefers it over the pre-made options available in the supermarket. I feel like I've really nailed the slightly sweet flavour of ketchup, but much prefer this to anything that comes in a bottle.


Lemon curd was something that I had been intending to make for a while but hadn't gotten around to it. It always reminds me of my grandmother (or mormor, in Swedish). She always had some on hand in her fridge, & it got me thinking of her while I was making it. I love the hit of lemon swirled in with the sweetness of sugar (or in this case, artificial sweetener). & after I made it, I realised just how Candida friendly & beneficial it is. Lemons, butter & eggs all in one!

Ketchup
Ingredients:
1 can chopped tomatoes (400g)
1/4 large yellow onion, chopped
1 clove garlic, chopped
½ teaspoon oregano
salt & pepper, to your desired taste
10-20 drops liquid sweetener
1 tablespoon apple cider vinegar
1/4 teaspoon cinnamon

Method:
1. Add all ingredients to a saucepan on medium heat.
2. Cover & simmer till excess liquid has evaporated. Stir occasionally.
3. When cooked, put to the side & allow to cool slightly. Transfer to a blender, & process until smooth.
4. Transfer to a bowl & serve!

Bearnaise
Ingredients
125g butter, melted
2 egg yolks
1/2 large yellow onion, chopped finely
3 tablespoons apple cider vinegar
1 teaspoon lemon juice
2 tablespoons water
2 teaspoons tarragon
pinch of pepper

Method:
1. Melt butter in a saucepan. In another, using a double-boiler method, add the onion, lemon juice, 1 tablespoon of water & 2 tablespoons of vinegar. On low heat, cook till half the liquid has evaporated, then add the remaining water & vinegar. Cook for another 5 minutes.
2. Remove from heat & add the egg yolks, stirring. Add the butter slowly.
3. Place back on heat & add the tarragon. Cook for another 5 minutes.
4. Transfer to a bowl. Once cooled, serve!

Lemon Curd
Ingredients:
2 egg yolks
30g butter
60mls lemon juice
6mls liquid sweetener (60g sugar)
pinch of lemon zest

Method:
1. Cream butter & sweetener
2. Add remaining ingredients & blend together. (It will probably look like it's curdling, but this is a good thing!)
3. Transfer to a saucepan & cook for 5 minutes on medium heat.
4. Transfer to a bowl, allow to cool & serve

I plan to make a lemon meringue pie, now that I can make the lemon curd & marshmallow. I've just got to play around with some pie crust ideas I have, incorporating coconut flour, shredded coconut & hazelnut meal. Oh, I'm looking forward to that!

Thursday, January 13, 2011

Blunders in the Kitchen

'You can't bake without breaking some eggs' is what H said to console me in my failed baking attempt this evening. It was one of those nights when a balance of things occurs; where one experiment succeeds & another one fails.

Earlier I'd decided that I was going to have a break from cooking today. I live with my boyfriend who works full time, & since I'm currently unemployed, I taken on the household duties as a way to even our work load. I make him lunch each day & cook us dinner, & also tackle the other chores around the house. Very much the traditional gender roles. Not something I plan to do long term, but it's fun to play it out for a while. Today I thought I would give myself a break; there's plenty of food in the fridge that's easy to gather when the hunger hits, so not having anything to eat wasn't a problem. After I got home from drum practice though, I felt the desire hit. Not so much to eat, but to create. So I decided to have another go at zucchini bread that I could this time consume.


My first & last batch contained flax seeds, an ingredient I recently tried to reintroduce into my diet, but discovered I still can't consume it. My stomach just really can't take flax. It continues to induce a massive cramping response in my stomach, & last time I baked this bread, I was on the couch in pain for hours.

So I made a new loaf, sans flax. All was going well at this point. The batter tasted fine, I'd made notes of the ingredients as I went along. It was looking pretty after I sprinkled some pumpkin seeds on top. As I placed the loaf into the oven, I considered remaking the Scandinavian thumbprint cookies for this month's SOS challenge, hosted by Ricki & Kim (the challenge ingredient being coconut oil, which I use in all my cooking, so I'm eager to put a recipe forward for the event). Even though my zucchini loaf contains coconut oil, the original recipe isn't vegan friendly (however it can be easily made so, & I've added these alterations to the recipe below), so I decided that while that was baking I would go on to my cookies. & this is where it all fell downhill.

Zucchini loaf looking pretty & ready for the oven

I had finally purchased some stevia the other day. It's white stevia, & I've never used it before. In Australia I could only find green stevia; this white stevia is 200-300 stronger than sugar, whereas green is 40-50 times stronger. So I placed 3 grams of it into my 130 gram flour mix thinking it would be enough. No, it was too much. Way too much. The taste of the stevia overwhelmed. Not wanting to waste any of my mix, I added more flour, more oil, more coconut milk. Just making a larger batch. I threw out my idea of making thumbprint cookies & just added some strawberries to the mix to give the batter more moisture & to absorb more of the flavour. This worked. I rolled the mix out & cut it up using some cookie cutters, then placed it into the oven after taking the loaf out.

I decided to turn the tray around after about 10 minutes of baking, so everything would bake evenly. I drew out the tray, & one cookie fell through the lower gap of the door. I placed the tray on the open door & grabbed some tongs, trying to retrieve the lost cookie. In a moment of thoughtlessness, I grabbed the door to close it, hoping the cookie would fall through. Forgetting I'd placed the tray of cookies on it. All but 5 fell through the gap, & down into the dirty shelf below. Oh man.

I placed the remaining cookies back into the oven, scalding myself for such a silly move, & gathered the lost cookies. What a waste. I hate waste. Hate it. It's something my mother instilled in me as a child. If you won't eat it now, save it for later. We always had leftovers in the fridge. 'Waste not, want not'. So I was a little disappointed when I had to throw away most of my batch.

To top it off, I've been experiencing die-off effects from all the coconut oil that I used in the cookie mix. As I am want to do while baking, I sample the batter as I go along to make sure that it all tastes right. In an attempt to keep them vegan, I only used coconut oil, no butter. Instead of milk, I used coconut milk. So there was a lot of coconut fat in the batter, which basically means a lot of coconut oil. Too much coconut oil. Coconut oil is used in healing Candida, as it's antibacterial & high in saturated fat, which has been proven to kill Candida overgrowth. But too much of a good thing is a bad thing. My gut isn't happy right now. But at least a lot of bacteria is getting killed off :P

So there you have it. Where one fails, one also succeeds. My bread came out great. H was happy with it. He was even satisfied with one of my failed cookies, saying that the stevia taste wasn't overpowering & it reminded him of licorice root, & that it tastes better than the liquid sweetener I've been using. So that's something. My first attempt with white stevia may not have come out as planned, but it's definitely been a lesson learned. Here's to a more successful attempt later.

But, enough wallowing. Here's my success of the evening: my version of zucchini bread. The taste came out great, it really reminded me of bread. The taste is simple, & therefore open to have any kind of topping added to it. It's moist & thick, & high in protein with good fats (yes, saturated fat is a good fat, despite what we may have been told over the years. A lot of research being conducted is finding its health benefits are much greater than the vegetable oils we've taken to consume, & is debunking former opinions of the detriments of saturated fat). I wanted to create something different from other people's versions of zucchini bread. I can't have dried fruit, & most nuts are out for me, & sometimes it's nice to have a simple bread. I've added some vegan alterations to the recipe, so everyone can give it a go. & I've decided that this will be my submission to this month's SOS challenge!

I hope you enjoy it as much as we are!


Zucchini Bread
Ingredients:
1dl + 1 tablespoon (115g) coconut flour, sifted
1 tablespoon (15g) psyllium husk
1 tablespoon (15g) ground hazelnuts
1/4 large zucchini, grated
1 teaspoon cinnamon
2 mls liquid sweetener/ 20g sugar / ½ml white stevia
25g butter, melted
15g coconut oil, melted
2 eggs
1 tablespoon apple cider vinegar
45 mls water
1/4 cup milk
1/4 teaspoon bicarb soda
pinch of salt
pinch of nutmeg
pumpkin seeds

(For a vegan alternative, remove the eggs & double the amount of psyllium husk & liquids; replace milk with soy or coconut milk; replace butter with coconut oil)

Method:
1. Preheat oven to 180 degrees celcius.
2. Sift coconut flour. Add psyllium husk, ground hazelnuts, cinnamon, bicarb, salt & nutmeg to the same bowl & mix well together.
3. Whisk eggs in a seperate bowl. Add the liquid sweetener (if using stevia, add to the dry mix), vinegar, milk & water & stir together.
4. Add the melted butter & coconut oil to the flour mixture & stir through. Add the rest of the wet ingredients & the grated zucchini, & mix well together. The batter should be sticky but it should hold together well.
5. Line bread tin with baking paper & place the batter in the tin. Top batter with the pumpkin seeds.
6. Bake at 180 degrees for 40-45 minutes.